> For the complete documentation index, see [llms.txt](https://clients.medianova.com/llms.txt). Markdown versions of documentation pages are available by appending `.md` to page URLs; this page is available as [Markdown](https://clients.medianova.com/products/security/ssl-tls-encryption/upload-and-manage-ssl-certificates.md).
# Upload and Manage SSL Certificates
Learn how to upload and manage SSL certificates in the Medianova Control Panel.
SSL/TLS certificates enable encrypted HTTPS communication between users and CDN Resources. From the **SSL / TLS** page, you can upload your own certificates or request free Let's Encrypt certificates using a guided provisioning wizard.
{% hint style="info" %}
TLS is the modern version of SSL. Medianova supports TLS 1.2 and TLS 1.3 for all SSL/TLS connections.
{% endhint %}
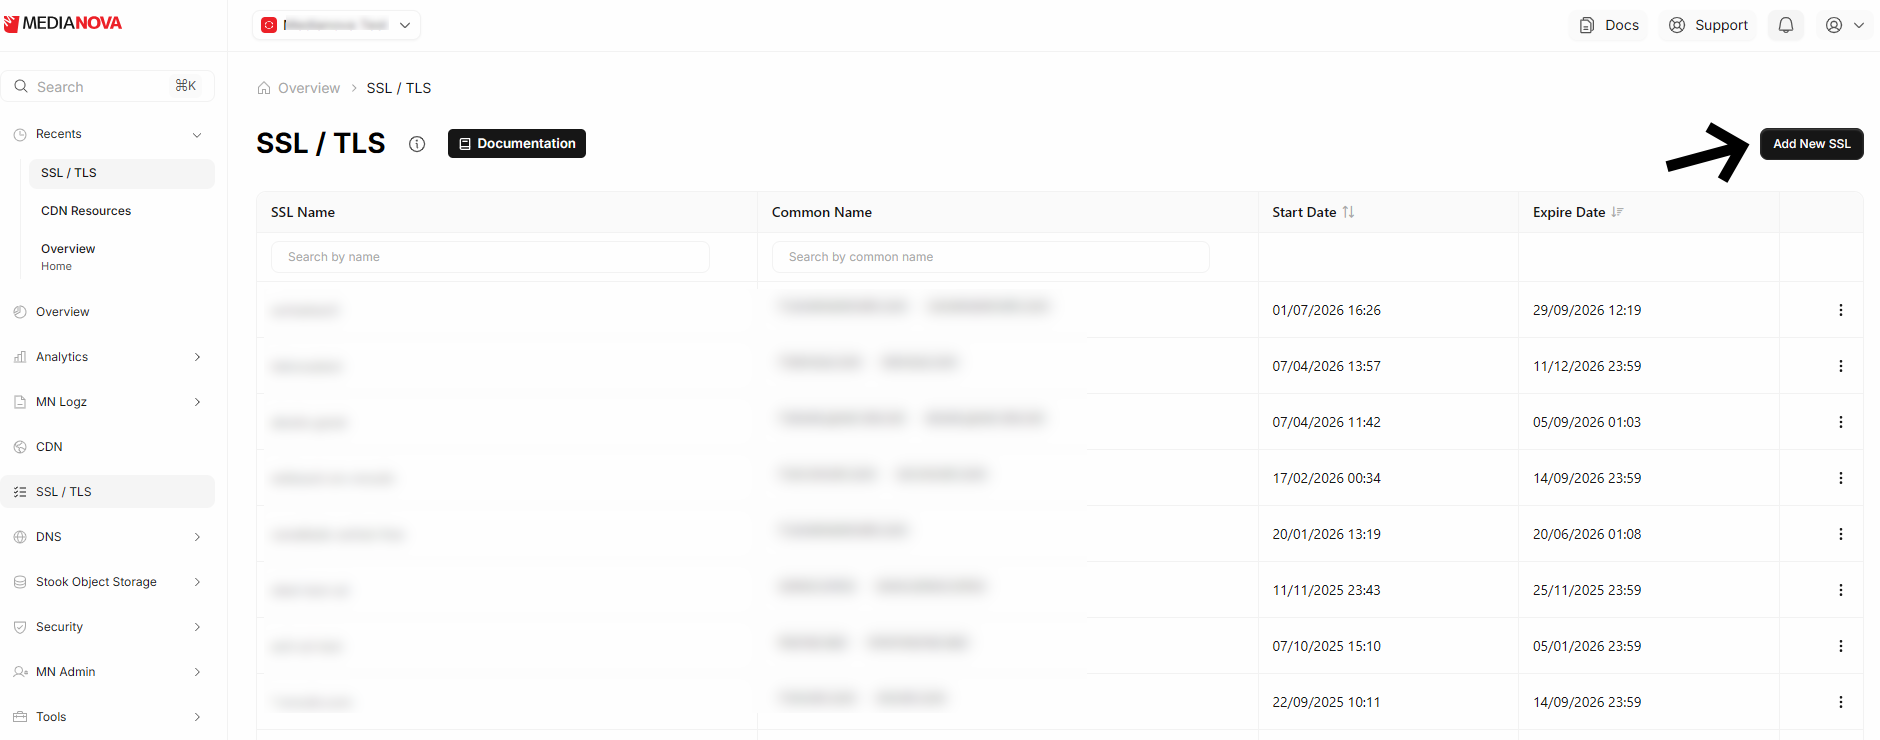
Manage your certificates from the **SSL / TLS** page in the [Medianova Control Panel](https://cloud.medianova.com/)
## Upload SSL Certificates
1. Open **SSL / TLS** from the left navigation menu.
2. Review the certificates currently available in your account.
3. Click **Add New SSL**.
{% stepper %}
{% step %}
## Choose the Certificate Type
Select how you want to provision the certificate.
* **Add Own SSL** – Upload or import an existing certificate issued by a Certificate Authority (CA).
* **Free SSL** – Request a free Let's Encrypt certificate through DNS/CNAME validation.
### Add Your Own SSL
Upload an existing SSL/TLS certificate using one of the supported import methods.
#### SSL Certificate Name
Enter a descriptive name to identify the certificate within the Control Panel.
This name is used only for management purposes and does not affect the certificate itself.
#### Certificate Import Methods
Choose one of the following import methods.
#### Domain SSL
Retrieve an existing certificate directly from a domain that already serves HTTPS.
Configure:
* **SSL Certificate Name**
* **Domain**
Click **Check SSL** to retrieve the certificate information.
The wizard displays:
* Subject
* Issuer
* Expiration date
After verification, provide the matching private key before continuing.
#### Paste .crt / .key
Paste the certificate and private key directly into the corresponding fields.
Required fields:
* Certificate (.crt / .pem)
* Private Key (.key)
Use this method when certificate files are already available as text.
#### Upload Certificate Files
Upload the certificate and private key files from your local computer.
Supported file types include:
* `.crt`
* `.pem`
* `.key`
#### Upload PKCS#12 (.pfx)
Upload a PKCS#12 certificate bundle.
Configure:
* `.pfx` file
* PFX Password (if required)
The wizard extracts the certificate and private key automatically.
#### Certificate Validation
Before continuing, verify the following:
* The certificate and private key belong to the same certificate pair.
* The uploaded certificate is valid and has not expired.
* The certificate covers the required domain or wildcard domain.
> **Important**
>
> Always upload the complete certificate chain, including intermediate certificates when provided. Uploading only the leaf certificate may result in browser trust warnings or incomplete certificate validation.
Click **Next** after completing the required information.
### Request a Free SSL Certificate
Request a free Let's Encrypt certificate directly from the wizard.
#### SSL Certificate Name
Enter a descriptive name for the certificate.
#### Domain
Choose one of the following options.
#### Existing Domain
Select a domain that already exists in your account.
Then choose the required certificate coverage.
#### New Domain
Enter a new domain that will be secured by the certificate.
The domain must resolve to the Medianova edge network before DNS validation can complete.
#### Coverage
Select the required certificate scope.
Option
Description
Single Domain
Protects a single hostname.
Wildcard
Protects all subdomains of a domain. DNS/CNAME validation is required.
Click **Next** to continue.
{% endstep %}
{% step %}
## Review & Activate
Review the certificate configuration before creating the certificate.
The summary includes:
* Provisioning method
* Certificate name
* Domain
* Coverage
Optionally assign the certificate to one or more CDN Resources during this step.
The Control Panel automatically determines the required DNS validation workflow based on the selected certificate type and the associated CDN Resource configuration.
The resource list includes:
* CDN URL
* Resource Type
* Domain
Select the resources that should use the certificate immediately after creation.
Click **Create SSL** to start certificate provisioning.
{% endstep %}
{% endstepper %}
{% hint style="info" %}
**Notifications**
After an SSL certificate is created, updated, or its validation status changes, Medianova sends notifications to the user who initiated the request and the account owner.
Status updates are also available through Control Panel notifications.
{% endhint %}
## Manage Certificates
After a certificate is created, it appears on the **SSL / TLS** page.
From this page you can:
* Search certificates
* View certificate details
* Review expiration dates
* Delete unused certificates
* Assign certificates to additional CDN Resources
Certificates requested through **Free SSL** automatically enter the validation process after creation.
{% hint style="info" %}
The required DNS validation records vary depending on the selected certificate type and associated CDN Resource configuration. Always use the DNS values displayed by the Control Panel during certificate provisioning.
For DNS validation, pending requests, renewal, and validation status, see **Use Free SSL Certificates**.
{% endhint %}
### Related Concepts
* [SSL / TLS Encryption](/products/security/ssl-tls-encryption.md)
* [Use Free SSL Certificates](/products/security/ssl-tls-encryption/use-free-ssl-certificates.md)
* [CNAME & SSL](/products/performance-cdn/static-content-delivery/advanced-configuration/cname-and-ssl.md)
---
# Agent Instructions
This documentation is published with GitBook. GitBook is the documentation platform designed so that both humans and AI agents can read, navigate, and reason over technical content effectively. Learn more at gitbook.com.
## Querying This Documentation
If you need additional information that is not directly available in this page, you can query the documentation by asking a question.
Perform an HTTP GET request on the following URL with the `ask` and `goal` query parameters:
```
GET https://clients.medianova.com/products/security/ssl-tls-encryption/upload-and-manage-ssl-certificates.md?ask=&goal=
```
`ask` is the immediate question: it should be specific, self-contained, and written in natural language.
`goal` is what the user is ultimately trying to achieve, the reason they need the answer. Sharing it helps GitBook give you a better, more relevant answer. A goal is most helpful when it describes the outcome the user wants rather than restating the question. For example, with `ask=how do I create an API token`, a goal like `automate deployments from our CI pipeline` lets GitBook tailor the answer to that use case.
The response will contain a direct answer to the question and relevant excerpts and sources from the documentation.
Use this mechanism when the answer is not explicitly present in the current page, you need clarification or additional context, or you want to retrieve related documentation sections.
.png?alt=media)
.png?alt=media)
.png?alt=media)
.png?alt=media)
.png?alt=media)
.png?alt=media)
.png?alt=media)
.png?alt=media)